Velodyne VLP - 16
Introduction
The VLP-16 creates 360◦ 3D images by using 16 laser/detector pairs mounted in a compact housing. The housing rapidly spins and the lasers fire thousands of times per second, providing a 3D point cloud in real time. Figure 1 shows an imaging system where LiDAR is used.
Some of the important features include:
- Horizontal Field of View (FOV) of 360◦
- Vertical Field of View of 30◦
- Rotational speed of 5-20 rotations per second (adjustable)
- Returns of up to 100m (useful range depends on application).

Software Installation
The following guide walks you through the installation steps for using the VeloView software that comes with Velodyne VLP-16. This guide developed by installing the software on system running Ubuntu 16.04LTS. For installation steps on other platforms refer the site VeloView wiki and downloads.
Installation steps:
1. Getting the source code
Open the terminal and change the directory where you want to install the software. Then use the following command to pull the source files.
Note: This assumes git is already installed on the system, if not use $ sudo apt-get install git command before following the next steps.
$ git clone git://public.kitware.com/VeloView.git
2. Configuring and building
- First we need to install all the dependencies if they are already not installed. Follow the instructions below to set it up on your system:
$ sudo apt-get install cmake-curses-gui
$ sudo apt-get install build-essential
$ sudo apt-get install libboost-all-dev
$ sudo apt-get install libxt-dev
$ sudo apt-get install libbz2-dev
$ sudo apt-get install libqt4-dev
$ sudo apt-get install qt4-default
$ sudo apt-get install qt4-dev-tools
$ sudo apt-get install zlib1g-dev
- Next, we need to check the installed version of cmake. To do this use cmake –version in the terminal. Note that CMake >= 3.2 is sufficient to build VeloView.
If this is not the case after running cmake –version, follow the next step, others can skip the following commands and read further.
$ sudo apt-get install software-properties-common
$ sudo add-apt-repository ppa:george-edison55/cmake-3.x
$ sudo apt-get update
$ sudo apt-get install --reinstall cmake
- On Linux, libpcap can either be installed as a package or built from source. If you want to build from source, you would additionally need to install flex and byacc. This guide uses the package version.
$ sudo apt-get install libpcap-dev
- Now go back to the directory where you cloned the git repository for VeloView if already not there, then execute:
$ mkdir build
$ cd build
$ cmake -DENABLE_veloview:BOOL=ON ../Superbuild
This may not succeed, and might fail with an error as shown in figure below:
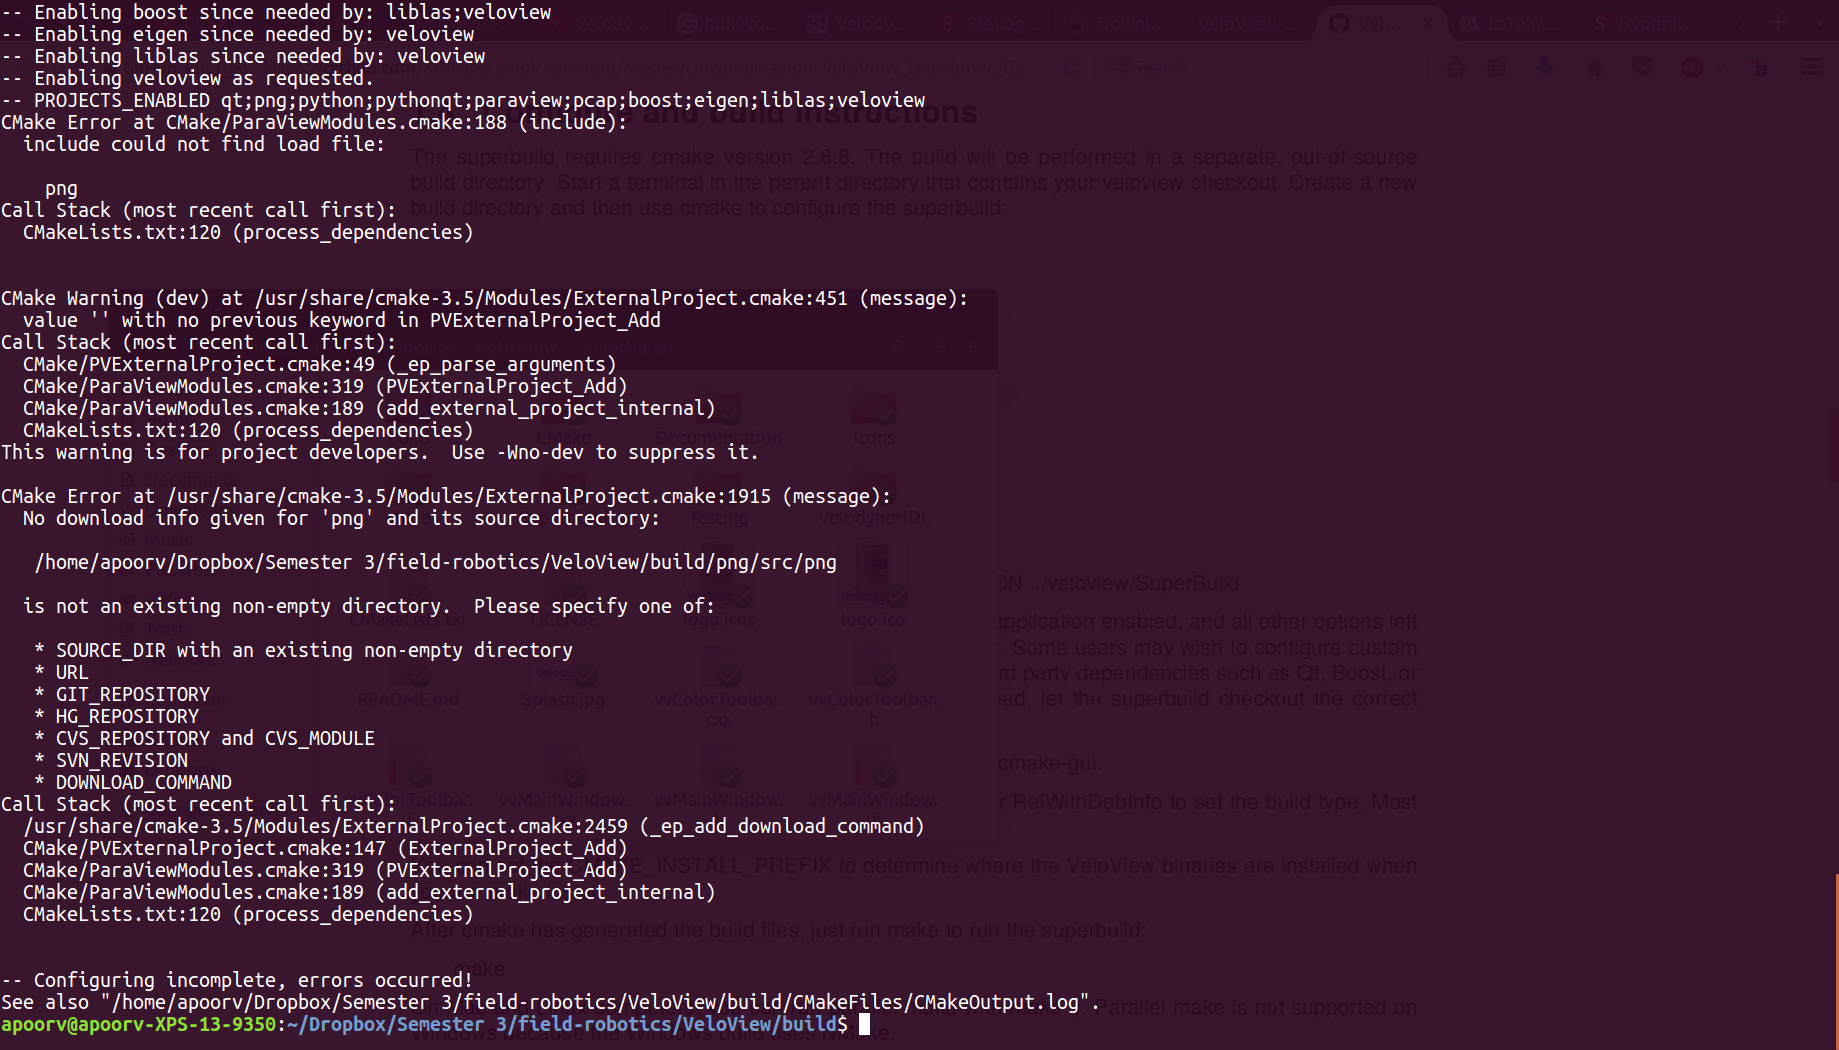
In this case change back to VeloView directory and execute the following com- mands:
ccmake Superbuild
This will open CMake configuration file in the terminal. Enable the options shown below by navigating to the option and pressing the Enter key.
ENABLE_veloview=ON
USE_SYSTEM_boost=ON
USE_SYSTEM_python=ON
USE_SYSTEM_qt=ON
Note: All the options might not be on the same page, in such a scenario press c to configure by enabling the options available, this will bring up other options and continue the process.
Once all the options are enabled press g, which will save the configurations and exit.
At this point try the command below again
cmake -DENABLE_veloview:BOOL=ON ../Superbuild
Other possible reason for failure would be your system has both Qt4 and Qt5 installed, in which case you need to choose Qt4 before building. To do that, run the following in the bash:
$ export Qt_SELECT=qt14
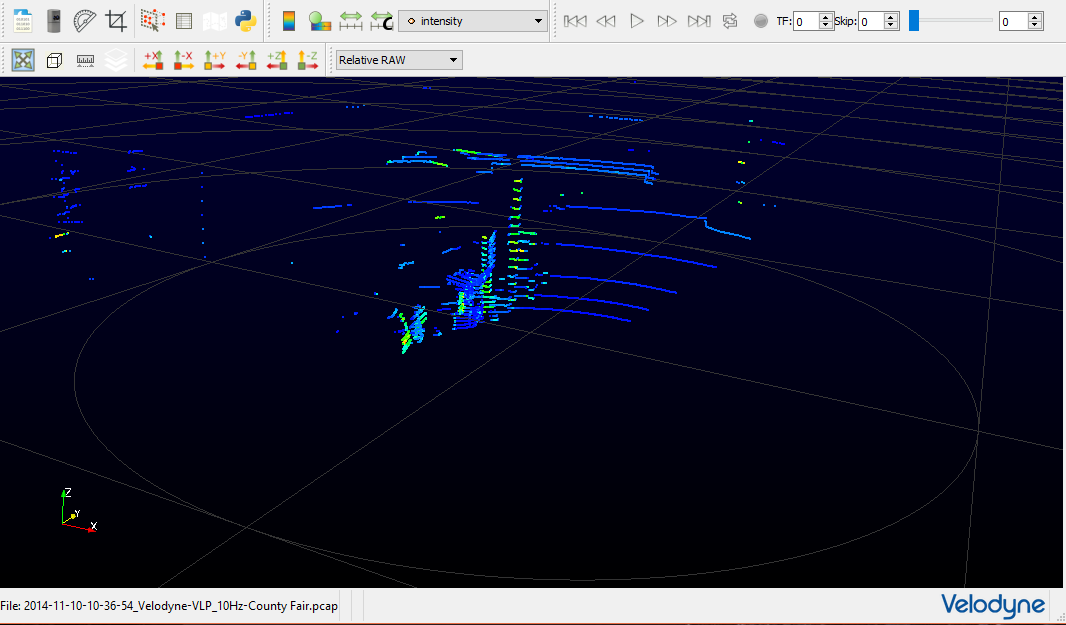
Now you should see the message Configuring done and Build files have been written to build directory as shown in the screeenshot in Figure 3.
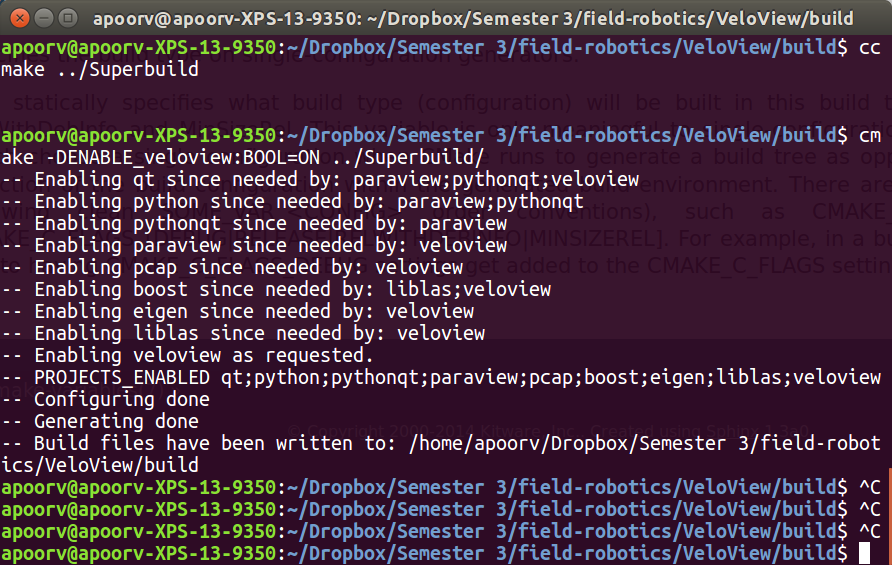
Figure 4 shows VeloView software running the sample data downloaded from [2] Sample data for the VeloView application.